WP Secure Flow Installation Guide
WP Secure Flow enables you to password-protect any WordPress content with ease and flexibility. The plugin features a single file architecture—installing the free version and simply adding a license key instantly unlocks all Pro features without requiring a separate download.
Table of Contents
1Download WP Secure Flow
- Visit the official website: Navigate to
https://secureflowsolutions.com. - Locate the download button: On the homepage, click the “Download & Install For Free Now” button.
WP Secure Flow homepage with download button highlighted

The homepage hero highlights WP Secure Flow’s main Download & Install For Free Now button plus a top‑nav Install Plugin link—your first step to securing WordPress pages and posts. - Download the latest version: You’ll be redirected to the WP Secure Flow Releases page. Click “Download WP Secure Flow vX.X.XX” to save the
wp-secure-flow.zipfile.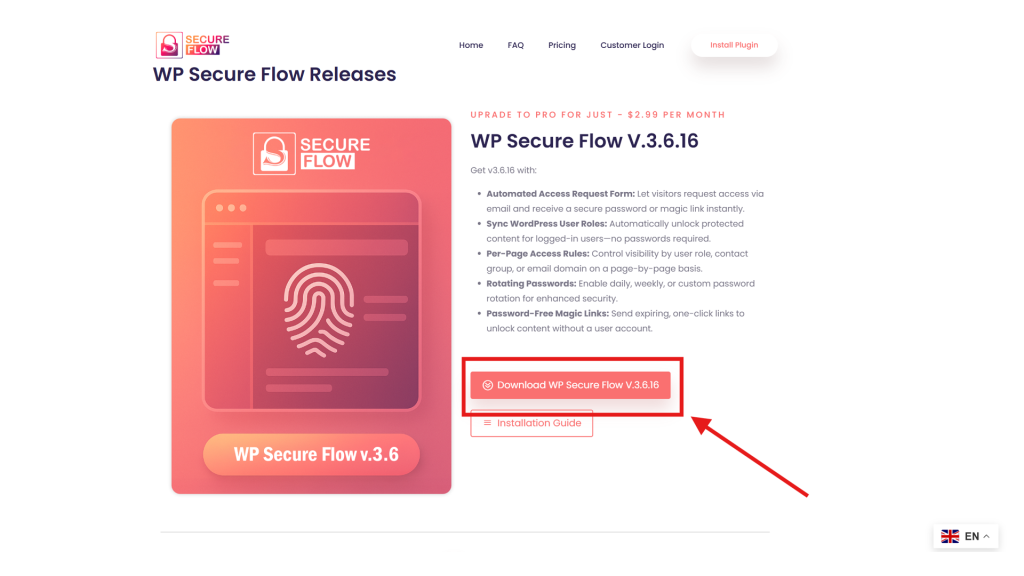
Click the red “Download WP Secure Flow v3.6.16” button to grab the newest version of the WP Secure Flow password‑protection plugin. Click the red download button to get the latest version
- Save the ZIP file: Store it in an easily accessible location (e.g., your Downloads folder).
Pro Tip
Always download directly from the official website to ensure you have the latest version with all security patches and feature updates.
2Install the Plugin
- Log in to your WordPress admin dashboard.
- Navigate to Plugins › Add New.
- Click the Upload Plugin button at the top of the page.
- Select the
wp-secure-flow.zipfile you downloaded and click Install Now.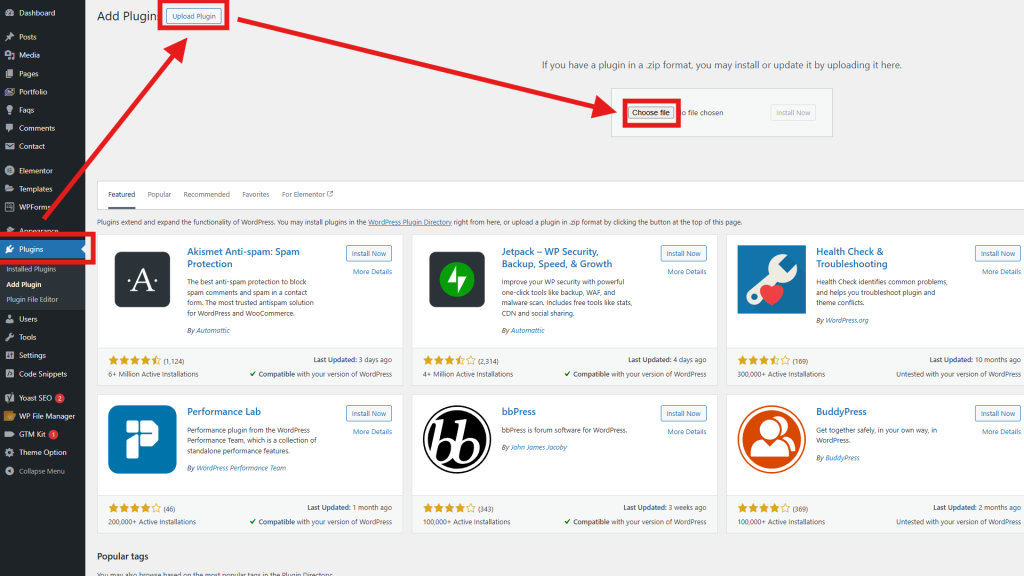
This image displays the WordPress admin interface on the “Add Plugins” page. Red arrows point to the sidebar Plugins menu, the Upload Plugin tab at the top, and the Choose File button in the upload box—showing the exact steps for manually installing the WP Secure Flow plugin ZIP. WordPress plugin upload interface
- When WordPress displays “Plugin installed successfully,” click the Activate Plugin button.
Important
If you’re updating from a previous version, it’s recommended to back up your website before installation, although WP Secure Flow is designed to update seamlessly without affecting your existing protected content.
3Activate WP Secure Flow
After successful activation, you’ll notice a new menu called Secure Flow in your WordPress admin sidebar. Alternatively, you can access the plugin via Settings › WP Secure Flow.
Feature Availability
At this point, all free features are available for immediate use. You can begin protecting your content with standard password protection.
4Unlock Pro Features
To access premium features like Magic Links, Rotating Passwords, and advanced access controls:
- In the WordPress admin dashboard, navigate to Secure Flow › License.
- Enter the license key you received after purchase into the provided field.
- Click the Activate License button.
- Upon successful activation, all Pro features will be immediately available throughout the plugin interface.
One-File Architecture
WP Secure Flow uses an innovative one-file plugin architecture—meaning no separate download is required for the Pro version. Simply activating your license transforms the free version into the full Pro version instantly.
5Verify Installation
To ensure WP Secure Flow is properly installed and functioning:
- Check the Plugins page to confirm WP Secure Flow is listed as Active.
- Navigate to the Secure Flow settings page and verify it loads without errors.
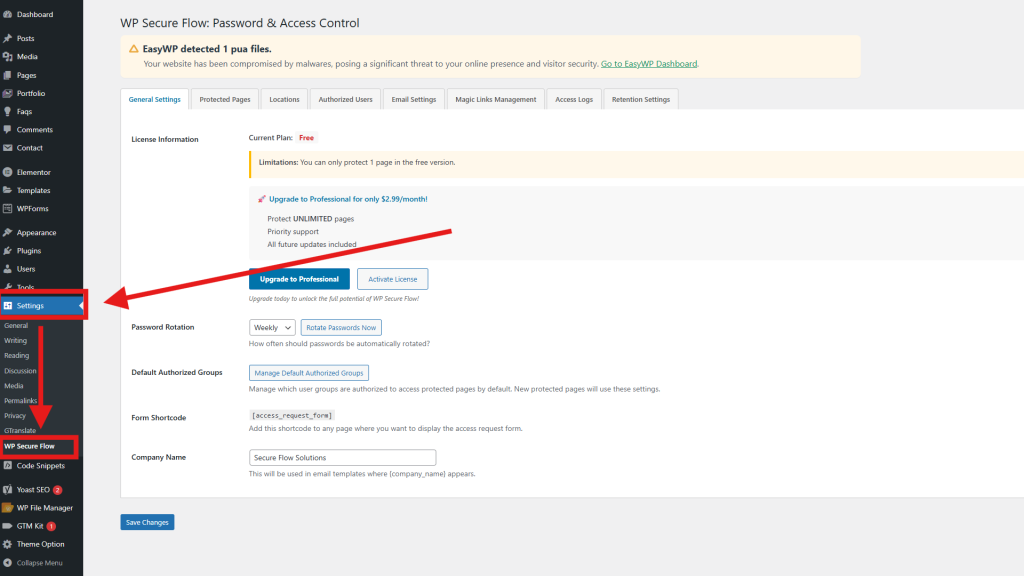
Easily install and activate the WP Secure Flow WordPress plugin to protect your pages with advanced password and access control. Follow this step-by-step setup guide and learn how to use license activation, password rotation, and shortcode integration. WP Secure Flow dashboard with menu highlighted in the WordPress sidebar
- Create a test page or post, protect it with a password using WP Secure Flow, and then verify the password prompt appears when viewing the page in a private/incognito browser window.
Testing Your Protected Content
For thorough testing, we recommend:
- Testing with different user roles
- Checking on mobile devices
- Verifying password reset functionality
- Testing any custom protection rules you’ve created
6Troubleshooting
Upload Error: “The link you followed has expired”
This typically occurs when your server’s PHP upload limits are too low.
- Contact your hosting provider to increase PHP
upload_max_filesizeandpost_max_sizevalues. - Alternatively, install the plugin via FTP by extracting the ZIP file and uploading the
wp-secure-flowfolder to yourwp-content/pluginsdirectory.
“Destination folder already exists”
This error indicates a previous installation exists:
- Delete the existing
wp-secure-flowfolder inwp-content/pluginsdirectory. - Proceed with reinstallation as described above.
Site Crashes After Activation
This rare issue typically indicates a PHP version or plugin conflict:
- Access your site via FTP and rename the
wp-secure-flowfolder (e.g., towp-secure-flow-disabled) to deactivate the plugin. - Ensure your server is running PHP 7.2 or higher (PHP 8.0+ recommended).
- Check for conflicts with other security or content protection plugins.
License Won’t Activate
- Ensure there are no extra spaces before or after the license key.
- Verify your server allows outbound connections to
secureflowsolutions.com. - Check that your license is valid and hasn’t reached its site activation limit.
Need Further Help?
If you continue experiencing issues, please contact our support team at [email protected] or visit our Support Center.